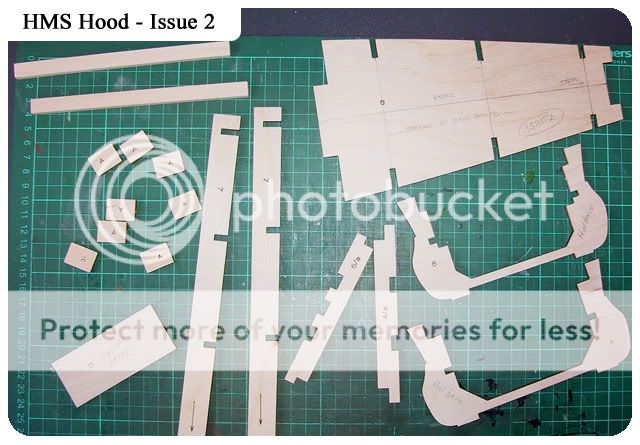
Now we start seeing the size of this beauty each week, Issue 2 part's are for the stern. Most of the build is pretty much the same as the last, a keel part (make sure its flat) and x2 frames. To start with the Keel, I've marked the centre line, sanded and checked. As you can see Ive also marked where the frames go.
These are the rest of the parts, all marked and sanded, beams and supports.
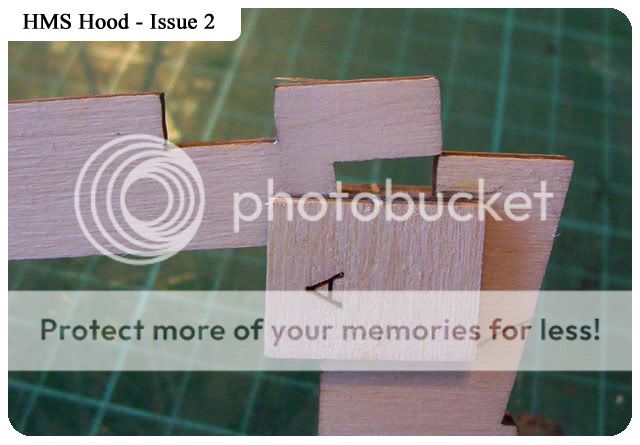
I wanted to just show close up the frames and parts A, they are shown here pencil marked, I am using Aliphatic wood glue, this is a more yellowy wood glue rather than the normal white PVA. A shows part's marked with pencil, B adding the glue, don't over do it, and C is spreading the glue with your finger.
Below is a close up to show where parts A are positioned on the frame.
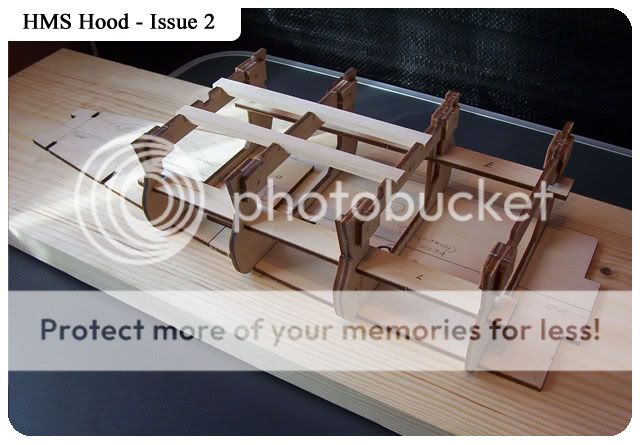
As I have not made a battleship of this size before I was unaware of what these tab were for, but it hit me along with the beams (not glued) that they are for the deck to rest on, and in turn you will be able to lift the decking off to get inside for radio control or any other reason, one comes to mind is when we are building the decking superstructure it would be a lot easier to do this away from the main hull, hence taking this off the main hull, so with that in mind I wanted to check the beams move freely between these A parts, if they are a little tight I sanded them just enough for the beams to move out more freely.
A light sand of the area that sits between parts A on the frames.
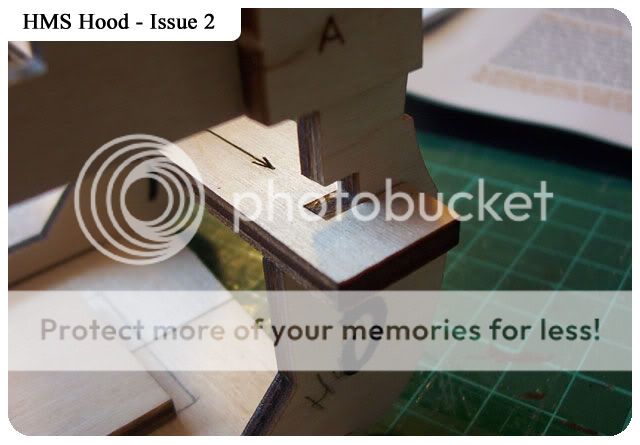
Notice the shape of the side frames, keeping in mind the arrows, these arrows point towards the stern (rear of the ship) making a mistake at this stage if you glue will be a massive problem, best to dry fit all the time.
After dry fitting the side frames the magazine didn't clearly show how they sit, so a few close up shots showing how they sit on the various frames.
All parts still dry fitted (except the main frames), laid over the plans.
Not quite sure yet where this is placed on the plans but its pretty close, maybe a little further back towards the bow.
Now the build board has arrived, not the best material to use but it was cheap, its straight, no warping and thick, I'm more than happy with this, it can also be used as the base for the model once finished. Maybe a little routing around the edges and stained, yep! that'll do me.
After a few more issues I intend to screw the keel parts down on the build board.
14th September has Issue 3 released, this will be heading towards the stem (bow), within a few weeks we will see her true size and hopefully the plans I had printed out a pretty close. Notice how much marking I'm doing on the parts, well worth it if your dry fitting at this stage, best to have some guidance on what goes where before it's all glued down.


No comments:
Post a Comment