This issue (10) has parts to reinforce the stern of the ship and adding a R/C part, if your like me not going down the R/C route this part can still be added as extra support for the frames (as per magazine instructions). Looking at what's in next weeks issue to me it looks like parts for the bow section, some support rails ect. The front cover has the same old picture..again!!!
I would like to stress that dry fitting is a must, I've found a few areas that were a little on the tight side and as such if they had glue on them it would of made a mess, so always dry fit, DON'T FORCE PARTS!!!
As always mark up your ply fret with the numbers as shown in the magazine, carefully cut them out and sand.
As you can see here these part are just dry fitting to make sure they all fit correctly and nothing is forced into position, check also the new parts don't force apart the frames already placed in the previous issue's.
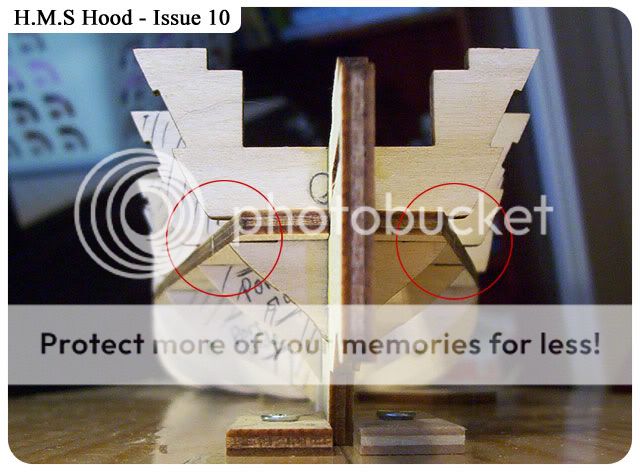
Notice the areas marked with the red circle, after dry fitting I noticed the side rails 41 & 42a were not flush with the frames from last weeks issue, I'm sure this is NOT a problem and can be filled out when we start the planking.
Before glueing part 41 (both side) I just sanded the side support rail from a few issue ago, part 20, to make sure the new part would sit flat, as I had some excess glue underneath this part. Not essential but worth checking it lays flat.
Both port and starboard parts 41 glued into position, hold them with a small clamp until the glue has dried.
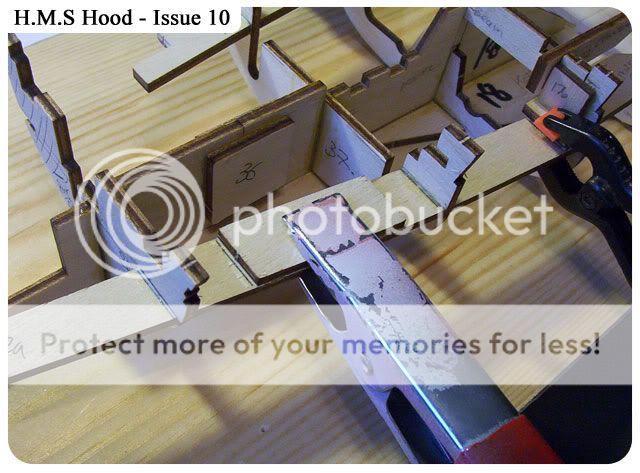
Now adding part 42 and 42a, hold the far end with a clamp as picture shows.
Add the support panel on both side (port & starboard)
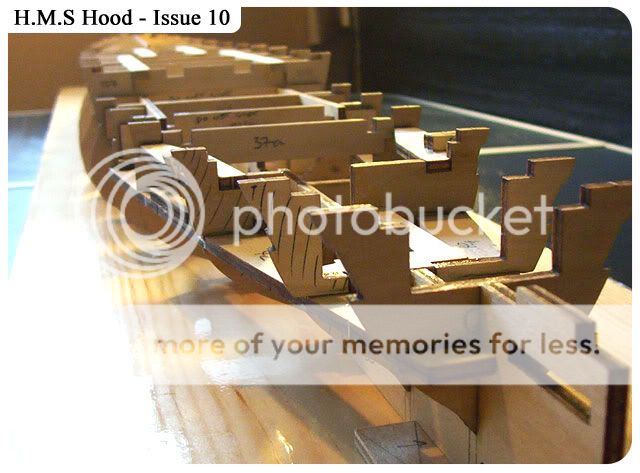
Before moving onto parts 45 add the servo support piece (44), it's pretty simple. Parts 45 in position and glued, make sure they sit well into the frames as show in the picture, also the small picture show the area where beam 37a will sit, make sure you don't get glue on this area.
An odd part here, parts 46 & 47, I find them a little out of place and wonder what they are needed for, considering there are frames to take the planks when we start planking.
Glue into place panels 37b on both side, making sure the beam 37a does NOT become glued along with the panels, this part will need to be removed.
All parts fitted and completes issue 10, nothing to difficult here, I have no doubt that when the planking starts it will become more time consuming.


hi its modelman, i am new to partworks but not models think your build dairy is brilliant .
ReplyDeletethink we are about the same stage of build .
thanks dave
Hi Dave, thanks for your comments, Im glad it help, im a little late in doing issue 11 so bear with me. Partworks can be frustrating in so much as the small bits of wood you can receive (Issue 12) but hang in there:) thanks again.
ReplyDelete